
An irregular load can look stable on the floor and still tip when lifted. To learn how to ship products with an irregular center of gravity, suspend the object from two different points and mark the vertical line below each one. Where the lines intersect is the balance point in that plane. The center of gravity shifts toward the heavier side, so locating it helps you plan how to support and secure the product.
When an object’s shape or weight distribution makes its balance point difficult to judge, treat that as a handling concern, not a minor detail. An unexpected shift can complicate lifting, handling, and shipment preparation. This guide explains what a load’s center of gravity is and how to locate it on an irregular object using suspension, a balance test, or a suitable CAD model. You’ll also learn how to use the result to plan a stable pick point and protective packaging.
Key Takeaways
- Use the load’s weight distribution to identify where its balance point is likely to sit before planning a lift or shipment.
- For an irregular object, compare vertical lines from separate suspension points to locate its center of gravity in a plane.
- Distinguish center of gravity from center of mass by considering how gravity affects the object and whether its density varies.
- Plan packaging around the product’s actual balance and support needs to limit shifting during handling and transit.
- Protective foam packaging can help support an off-center product, while stretch film can help secure packaging for shipment.
What is the Center of Gravity of a Load?
A load’s center of gravity is the point where it balances when supported. Because it shifts toward the heavier side, locating it helps you plan lifting, support, and protection during shipment.
- Use the weight distribution to estimate the balance point. In the example, a load weighs 3,000 pounds total: one end carries 2,000 pounds and the other carries 1,000 pounds. Its center of gravity lies closer to the heavier end than the midpoint. The balance point is not necessarily the geometric middle; the heavier end shifts it toward that side. Use the known weights and dimensions when calculating, rather than assuming the object is evenly balanced.
- Relate the balance point to the lift. A load supported at its center of gravity tends to balance. A pick point away from it can make the load tilt or swing. For an engineering check, mark the estimated point and use a plumb line to trace the vertical below a suspension point. This shows where the center of gravity sits relative to the lifting arrangement and the load’s footprint.
- Test the lift in controlled increments. After calculating a proposed pick point, use a jack or crane to raise the load gradually. Pause and watch for tipping or swinging. If it moves unexpectedly, lower it, adjust the pick point, and repeat the test. This checks the estimate under actual conditions before the full lift or shipment.
- Account for balance in moving parts and stability. Describe a hinged lid’s center of gravity by its horizontal and vertical distances from the main pivot when the lid is closed. The lid balances when its center of gravity sits directly above that pivot. Confusing the coordinates can leave a lid underbalanced, causing it to drop rather than close slowly. The same principle applies to loads that must remain stable while lifted or positioned.
To choose a box, pallet, or crate for an unevenly weighted item, identify its heavier side and support it so the weight stays balanced within the base. Choose a structure that suits the item and handling method, rather than relying on a centered footprint alone.
Use cushioning or foam supports to limit movement, then secure the packed load with suitable restraints. Position supports according to the product’s actual weight distribution, not just its outer shape.
In the United States, carriers apply the weight, size, packaging-condition, and handling limits for the selected service. Heavy or awkwardly balanced shipments may need freight handling instead of parcel service.
Mark the package with clear orientation arrows and a visible center-of-gravity indicator if handlers need to know which side is heavier. Add concise handling instructions that match the lifting and placement plan.
Finding the center of gravity of an irregular object
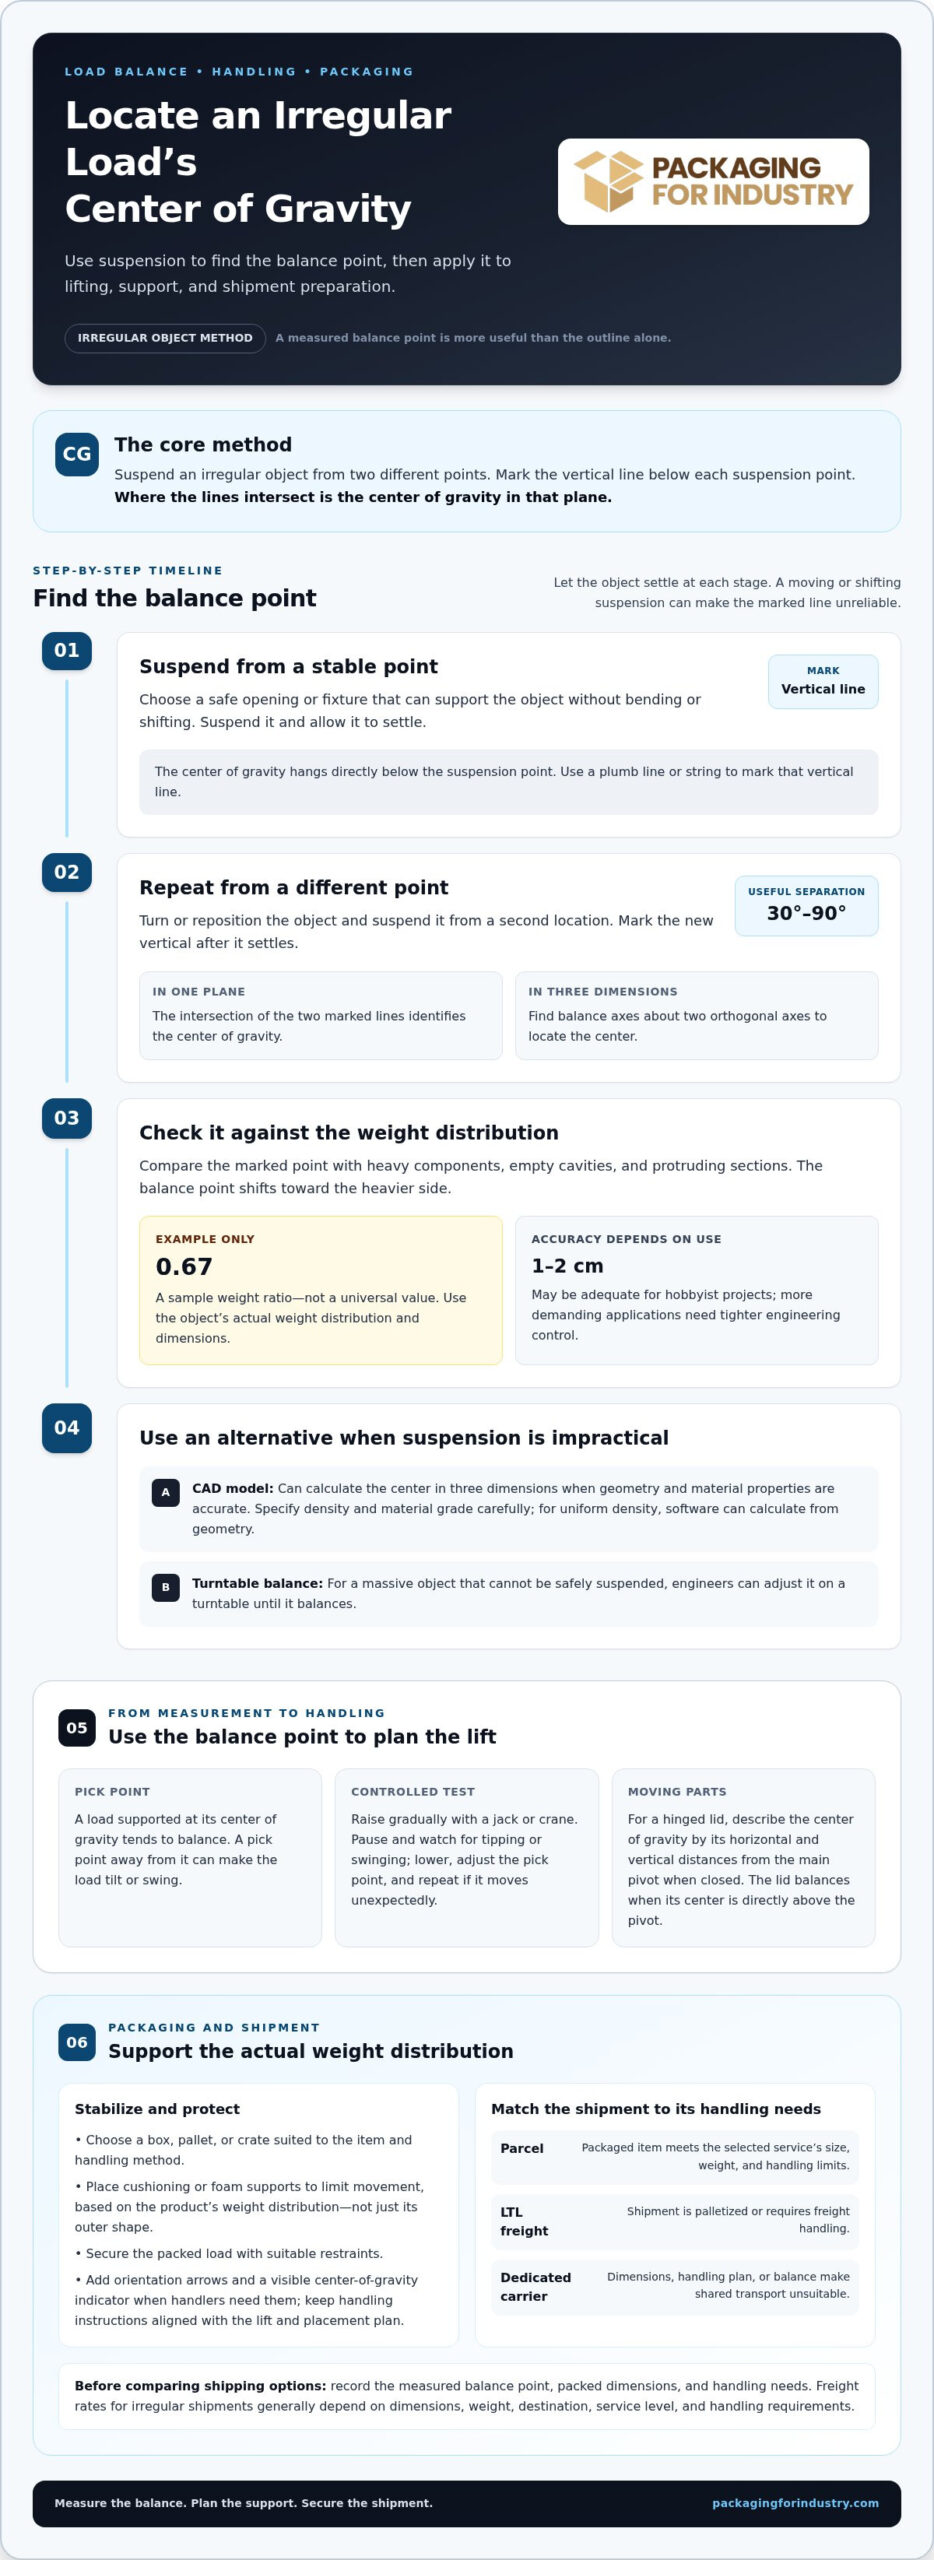
For an irregular object, use suspension to locate its balance point instead of estimating it from the outline. A two-point method shows where the weight acts, even when the object has uneven projections.
- Choose a stable suspension point. Select a safe opening or fixture that can support the object without bending or shifting. Suspend it and let it settle. Its center of gravity hangs directly below the suspension point, so mark a vertical line from that point. A plumb line or string makes the line easier to mark accurately.
- Repeat from another point. Turn or reposition the object, then suspend it from a second location. Points separated by about 30 to 90 degrees provide useful crossing lines. Once the object settles, mark the vertical line from this suspension point too. The intersection of the two lines identifies the center of gravity in that plane. For three-dimensional objects, find balance axes about two orthogonal axes to locate the center.
- Check the result against the object’s weight distribution. Compare the marked point with heavy components, empty cavities, and protruding sections. A sample calculation may use a weight ratio of 0.67; apply the object’s actual weight distribution and dimensions rather than treating that example as a universal value. For hobbyist projects, a target within 1-2 centimeters may be adequate. More demanding applications need tighter engineering control.
- Use a model when suspension is impractical. A CAD model can calculate the center of gravity in three dimensions if its geometry and material properties are accurate. Specify density and material grade carefully, since incorrect inputs distort the result. For a uniform-density object, software can calculate the point from its geometry. For a massive object that cannot be safely suspended, engineers can use a turntable and adjust the object until it balances.
Choose parcel service for a packaged item that meets the service’s size, weight, and handling limits. Use LTL freight when the shipment is palletized or requires freight handling. Consider a dedicated carrier when the dimensions, handling plan, or balance make shared transport unsuitable.
Freight rates for irregular shipments generally depend on dimensions, weight, destination, service level, and handling requirements. An awkward shape can affect the space the shipment occupies in a trailer and how crews handle it.
Record the measured balance point, packed dimensions, and handling needs before comparing options. For packaging designed around unusual product geometry, request a packaging quote with those details.
For a 3-D object, the intersection of balance axes found about two orthogonal axes gives its center of gravity. A CAD model can calculate an object’s center of gravity in three dimensions, but the model’s material properties need careful specification, including density and grade. Those details should be specified carefully when setting up the model.
A manufacturer can determine a lid or door’s center of gravity by taking force readings at different angles and analyzing the results with software. This method uses measurements across multiple angles to establish the center of gravity.
Center of gravity and center of mass
- Separate the two concepts before planning handling. Center of mass describes how an object’s mass is distributed. Center of gravity describes where gravity’s force acts on it. In a uniform gravity field, the two points align, so engineers can use the same location for both calculations. For a product on Earth, its center of mass describes the object, while its center of gravity informs how its weight acts during lifting and transport.
- Check whether material density is uniform. A solid made from one consistent material may have a center of mass determined largely by its geometry. A machine with a dense motor at one end, hollow sections, or components made from different materials needs a mass-weighted calculation. For example, an aluminum frame with a steel assembly cannot be treated as a uniform block. Material distribution changes the balance point and how the product responds to handling.
- Use the appropriate formula for a flat, uniform part. For a planar lamina with constant density, calculate its x-coordinate as x̄ = (1/A) ∫ x dA. Here, A is total area, and the integral weights each small area by its x-position. This method applies to a flat plate with uniform density. It does not capture a three-dimensional product’s depth or differences in density between components.
- Apply a density-weighted calculation to a three-dimensional body. When density varies across volume, its x-coordinate is x̄ = (1/M) ∭ x ρ dV. In this expression, M is total mass, ρ is local density, and dV is a small volume element. A heavy component contributes more than a light, equal-sized section. Use this approach when the product combines materials or has internal weight concentrated in specific regions.
- Translate the result into a shipping plan. Mark the calculated point on the product drawing or a physical sample, then compare it with the supports and lifting points. If the center falls near an edge, the packaging should restrain movement around that loaded side instead of treating every face equally. A CAD model can calculate a three-dimensional location, but its material properties must match the actual parts. Accurate density and material inputs matter: incorrect values can shift the result and undermine handling decisions.
Center of gravity definition
- Set a reference system for the product drawing. Choose a clear origin, such as a mounting face or base corner, and use it consistently across engineering and shipping documents. A shared reference helps teams compare the released drawing, packed item, and handling instructions without relying on vague descriptions like “toward the left.”
- Record the shipped configuration. List which components remain attached, which are removed, and where accessories are placed. A motor, battery, or removable assembly can change the load plan if its position changes. This record gives the packaging team the specific configuration needed to plan how to ship products with an irregular center of gravity.
- Keep the drawing and pack instructions aligned. Identify the product revision, packaging revision, and approved orientation on the same work instruction. If manufacturing changes a component’s location, send the updated drawing to packaging and warehouse teams before the next shipment. This document-control step helps prevent teams from packing a changed product to an outdated layout.
- Make handling marks unambiguous. Use consistent labels for the product’s top, base, and designated handling faces. Match them to the written instructions and package exterior. For example, if a component must remain upright, the orientation marking should match how the product is secured inside its container.
- Review changes before repeating a shipment method. Compare each new product configuration with the approved shipping record. A different accessory location, added component, or changed assembly may require a revised support and restraint plan. Teams planning how to ship products with an irregular center of gravity can use this review to keep engineering, manufacturing, and distribution instructions aligned.
How to package a product with an off-center center of gravity for shipping?
- Document the product’s shipping configuration. Record its dimensions, weight distribution, orientation, and any parts packed separately. A machine with a motor mounted on one side may balance differently after accessories are removed. Plan supports and restraints for the actual shipment configuration, not just the assembled product shown in the drawing.
- Set a stable support base. Place the product so its center of gravity falls within the area supported by the package or pallet. If a heavy component sits near one edge, position the product so that side remains supported. For palletized freight, align the load with the usable deck and avoid unsupported overhang.
- Build a fitted cradle around contact points. Use shaped supports to hold the product in place without concentrating pressure on delicate features. A projecting shaft, thin panel, or control housing may need clearance, while a sturdier frame can provide a support surface. Fit each contact point to the product’s shape and load path.
- Block movement in every direction. Add cushioning or foam where the product could shift, rotate, or strike the package interior. A heavy side may need closer support than a lighter one. Fill voids without forcing the product out of position, and keep loose accessories from changing the package’s weight distribution.
- Restrain the product to its base. Use suitable straps or other restraints to limit movement during handling. Place them over strong structural areas, not fragile panels or exposed components. Check that tightening a restraint does not tilt the product or compress cushioning unevenly. The load should remain seated in its cradle.
- Protect the outer package and palletized load. Choose a box or crate that accommodates the supports and restraints without pressing them against the product. For pallet loads, secure the package against sliding or rotating during movement. Keep the marked orientation consistent with the product’s position inside the packaging.
- Inspect the completed pack before release. Confirm that the product cannot shift, the outer container closes correctly, and the restraints remain secure. Check every side, including the heavy end and base. If the pack moves or leans during a controlled handling check, revise the supports before shipping.
Consider how the uneven load will be handled after pickup. A package that stays upright in storage may be tilted or repositioned during transfer, so supports should continue to secure the heavy side in those conditions. Make orientation marks easy to see and consistent with the product’s position inside the package. Keep handling instructions consistent throughout the shipment so each person can identify the supported base and avoid pressing on vulnerable areas.
Last-mile delivery can account for over 53% of the total cost of shipping. A well-secured package can help avoid preventable damage and the disruption of addressing it after delivery. Before dispatch, confirm that the finished package is practical to handle as well as protective: its weight should remain supported, restraints should not loosen when the load is moved, and the outer container should protect the fitted supports. If handling reveals a tendency to lean or shift, adjust the packing before the shipment leaves.
Packaging For Industry (PFI): Foam Packaging
Packaging For Industry (PFI) offers foam packaging for manufacturers shipping products that need fitted support. Foam inserts and other protective foam packaging can help keep components in position inside a package. This can suit aerospace, electronics, and medical device products with unusual shapes or sensitive areas that require considered protection.
PFI also offers stretch film to secure packaged loads, along with Vendor Managed Inventory (VMI) for recurring supply needs. For businesses in Orange County, Los Angeles, and San Diego, PFI’s industrial packaging services are a practical next step when product protection and reliable packaging supply matter.
Contact Packaging For Industry (PFI) to discuss foam packaging for your product.
Build a Repeatable Shipping Plan
Turn your balance assessment into a packaging standard for future shipments. Document the product configuration, support locations, and restraint placement, then share the plan with the people who prepare and handle each load. If the design or components change, review the packaging layout so the new configuration remains properly supported.
Planning how to ship products with an irregular center of gravity is easier when product engineering, warehouse operations, and shipping teams follow the same instructions. A consistent process helps reduce avoidable handling problems and makes packaging decisions easier to repeat across production runs.
For a product-specific packaging discussion, share its configuration and shipping requirements with Packaging For Industry (PFI).
Use each shipment to refine the plan and strengthen supply reliability.
Frequently Asked Questions
What is Centre of Gravity?
Center of gravity represents how a product’s weight acts during handling. For shipping teams, the key question is how that location relates to the product’s marked top, base, and approved lift faces. Keep these references consistent across engineering drawings, work instructions, and shipping labels. This shared language helps warehouse staff follow the handling plan without making assumptions based on the product’s shape.
How to calculate the center of gravity of an irregularly shaped product?
Start with the finished shipping configuration, not a simplified outline. Gather the product drawing, component locations, and verified weights for major assemblies, then use an engineering model to assess the complete configuration. Include removable parts only if they travel attached. Compare the result with the physical unit and update the record whenever the design or assembly changes.
How to prevent irregularly weighted cargo from tipping or shifting in transit?
Control the shipment’s orientation from packing through delivery. Clearly mark the required upright position on the package and give warehouse teams consistent loading and unloading instructions. Keep other freight from pressing against vulnerable projections. At receiving, inspect the package before moving it onward so visible movement or external damage is recorded before unpacking.
What are the risks of shipping a product with an unstable center of gravity, and how can damage be prevented?
An unstable shipment can be harder to position and may expose delicate assemblies, connectors, or calibrated components to impact. Reduce risk by identifying sensitive areas in the product documentation and inspecting them after transit. Photograph the package when it arrives, note any crushed or displaced panels, and compare the product with its pre-shipment inspection record. This evidence can help improve the next shipment plan.